Sunday, November 13, 2011

More finds at Funky Finds!

My skin is having a quarter life crisis and has decided it is allergic to everything. Not cool, body... Not cool at all. I already had sensitive skin. Now it's out of control sensitive and I itch like crazy. I have had to switch to using all natural products and so far they've been working. Well, all natural products can be pretty expensive. These vendors were at Funky Finds and have some amazing and reasonably priced products:

The Soap Addict- (www.thesoapaddict.com) I love the solid lotion bars and almond oatmeal soap! The oatmeal helps with the itching and it smells amazing. The solid lotion bars are really moisturizing and don't leave your hands feeling greasy. My favorite is Almond and Jadyn's is Mint! Jadyn also really loves the Hot Cocoa lip balm. She loved it SO much she spent HER OWN money on it!

Chunky Butt Designs (www.chunkybuttdesigns.net) has more natural bath stuff! My favorite product is the Oatmeal, Milk and Honey Therapeutic Bath Soak. It smells amazing! A 16 oz jar was $15 and well worth it. She also has bath bombs, body butter and bath salts! Jadyn loves the cotton candy bath salt!

While we're on the topic of all natural products.... I found a recipe for laundry soap that is great! All you need is a box of Borax, box of Arm & Hammer washing soap and 6 bars of Ivory soap bars. Using a gallon mason jar I found for $5 at Wal Mart, I added a cup of Borax and Washing Soap then shaved a bar of soap with a grater. Mix together and continue this process until you have used all of the soap! The total cost for all of this was about $14 and made a gallon of laundry soap. Best part- you only use 1 tbsp!! I add a little more because Jadyn can be pretty messy but this stuff is going to last for a long time!! Of course, I had to make my mason jar cute and used my Cricut and some vinyl to make a label! **Found this recipe on Pinterest!**

DIY Flower Headbands

I have a sassy daughter who LOVES to wear fancy things- one of those things being headbands! Her favorites are the ones with big flowers. I'm sure I've spent a small fortune on poorly made headbands that end up broken.

While at Funky Finds Craft Show in Ft Worth this weekend, there was a vendor selling super cute headbands with massive flowers. Jadyn is immediately lured to the booth by all the sparkle and fancy things! I tried to distract her with something else, but LUCKILY it didn't work or I would have missed this awesome idea! These were not JUST headbands with flowers. She had different color headbands with WASHERS glue to the side. Then she had taken different flowers and attached magnets to the back. There you have it- interchangeable flowers! We ended up buying a black glitter headband for $3 then went to Hobby Lobby to make our own flowers. Flowers were $1.67 each (I bought 7) and a set of 8 magnets was $1.99 (Magnet Strength-6). All you have to do is remove the stem and green part off the back of the flower, cut down the remaining plastic, hot glue a magnet and your done! Pretty easy, right?!

You could even make some fabric rosettes to attach- tutorial is somewhere below!

The vendor is: Charming Designs by Michelle Fisher

New problem- finding a place to keep all of the flowers and headbands. Solution- Use an old oatmeal container (the round ones with the lid, not the box!), empty and clean out and cover the outside in cute paper! Flowers go inside and headbands can be placed around the container!

Wednesday, July 20, 2011

Sass up your tank top!

I realized I have a ton of solid color tank tops filling my drawer. Who can resist the 2 for sales at Old Navy?! Not me, obviously. I was tired of the boring solid colors and wanted to add a little something to them so I went to Wal Mart. I would've much rather gone to Hobby Lobby or Michael's but Wal Mart was closer. I found some amazing silver sequin ribbon for $2 and bought some fabric glue for another $2. I made a design with the glue and stuck the sequin ribbon in place. Let dry and TA-DA!! Here is my new and improved tank top- I will probably wear it with one of my t-shirt cardigans... Don't hate, I'm broke and resourceful! :)

Thursday, July 14, 2011

Fun Nails

So simple and SUPER cute... Well, I think it is! Paint all but one of your nails a solid color. (I chose to leave my ring finger so people would notice the fact that their isn't a ring on that finger yet- kidding, kind of. haha) I picked a lighter color for my ring finger, then added some leopard spots. Don't worry, leopard spots are EAAAAASY! Using the color I painted the other nails with, I made different shaped blobs. With black nail art polish, I made a "cyclopse smiley face"- dot on one side of the blob and a smiley face on the other! Apply a top coat and TA-DA!!


Polishes I used:


  • Orly- Halley's Comet

  • Revlon Scented- Beach (I think it should be called Shrek, but whatever!)

Wednesday, July 13, 2011

Fab a Frame!


Using a longer frame and "S" hooks attached to the dowel rods, you can create a place to store your necklaces!


Tuesday, July 12, 2011

Who knew old t-shirts were so useful?!


Yes, it's ANOTHER way to turn an old shirt into something freaking FAB-U-LOUS. Any complaints... Didn't think so! While cleaning out my closest and getting rid of 27 pairs of shoes (you heard right), I started to go through my clothes and realized I have a TON of solid color long sleeve shirts. Some of them are great and others fit weird, like the one I used to make my NEW and AMAZING leopard trimmed black cardigan! THIS is where cleaning/organizing stopped and crafting started... I think I have a problem.


Are you ready for this... You will need an old (or new) shirt, scissors, embellishments and a sewing machine (you can always stitch by hand).


Cut down the middle of the shirt. Add whatever you desire to the edges. I used leopard print fabric scraps, but ribbon would look great! Sew it on and add whatever embellishments you want- buttons, rhinestones, whatever!! Seriously... in 10 minutes I had a brand new cardigan that I absolutely LOVE. Now if it would cool down so I can wear it!


Here is a picture of mine... Yes, it is a really weird angle because I had to take it of myself. When I asked Jadyn to take it, I ended up with a picture of the fan. What better use for an old black shirt with a stretched out neck?! It is still a work in progress but I was too excited to wait! Oh man, I love cardigans. :)


R.C.- I'm pretty sure you love cardigans as much as I do so this is for you! MAKE ONE!! :)


Turn your T-shirt into a SKIRT!

Once again, I used an old shirt I had laying around. The number of shirts "laying around" my house is ridiculous... Obviously.
1. Lay your shirt out. Make sure there are no wrinkles. Cut from armpit to armpit (pink line) in a straight line.

2. Turn shirt inside out. From where you have cut, fold down 1.5 inches and pin all the way around to secure (blue line). You will fold towards you. I iron it down to make a clean line, but it's not necessary.


3. Sew all the way around and remove pins.


4. Determine the length of elastic needed by wrapping it around your waist. Leave an extra inch and cut. Add a safety pin to one end of the elastic.


5. Shirt should still be inside out. Cut a small slit (green star) to slide elastic through. I cut mine towards what would be the back of my skirt.


6. Slide elastic through the slit and around the entire skirt. The safety pin will make it easier for you to slide. Make sure elastic is not twisted and lays flat.


7. Once you have elastic throughout the skirt, overlap elastic (about an inch) and sew together. Make sure it is secure and place inside the waistband. Sew the slit closed by sewing a vertical line securing the elastic and shirt/skirt together.


That's it! Now you have a simple, comfy skirt. If you don't have any elastic, you can cut two slits and thread ribbon through the waist to create a drawstring waistband. Add some ribbon to he bottom or appliques to the side- Be CREATIVE!!


I found this awesome tutorial HERE. If you need pictures to help guide you through the process, check it out! There are tons of great tutorials on her site, especially hair tutorials! Today, I am rocking the side ponytail french braid and LOVE IT!


I will post pictures of my skirt later! Still trying to decide what I want to add to it! :)

Sunday, July 10, 2011

fabulous curls WITHOUT heat... you heard me.

I know you've seen girls (maybe even some guys) with those amazing loose curls. I love the look, but don't have time to get up and curl my hair in the morning- it is so much easier to throw it into a ponytail and go! Another problem is standing there and curling my hair... pick up strand, little bit of hairspray, curl, repeat. It is a long process for me because I have such thick hair so I don't mess with it. Well, this method makes it sooooo easy to get the look you want. You put your hair up, go to sleep and take it out when you wake up- and I am willing to bet you already have ALL the tools you need! Below are the pictures of how mine turned out and some simple directions to do your own hair!


What you need: elastic headband... that's all! :)


It's hard to see in the pictures because J's hair is so dark, but you are going to pull the hair up and wrap behind the elastic headband. You will continue this process until all of the hair is up. If you use smaller strands of hair, you will get tighter curls... duh, right?!


and THIS is how mine turned out...


I got this from thelipstickdiaries video on YouTube. You can find her video HERE!

Wednesday, July 6, 2011

Upcycle your old t-shirts!

Who doesn't have tons of old t-shirts laying around?! I have this weird thing about wearing 'outdated' shirts- you know, the playoff shirt from 2009 when it is 2011- so I have a lot of shirts taking up space. Instead of letting them pile up around your house or throwing them away, turn them into something you could really use... or take them to Goodwill! :) With these directions, you can turn your old shirts into a headband or bracelet.

What you need:
hot glue gun, scissors, old shirts... yep, that's all!


I used the directions from this fabulous blog, Make it-Love it. Instead of sewing, you can use hot glue! If you can't get the braiding with 5 strands, use 3. For some of mine, I braided with 3 strands and connected them with other colored shirts to make a headband.... but I made the headband to big so it became a cute necklace!

These are so easy to make and look super cute! I have a really hard time keeping elastic headbands on my big dome of a head, but these have just enough stretch and stay in place all day. You can also make them a little more trendy by adding a rolled fabric flower! Tutorial found here. Here is a picture of the headband I made!

I have also used duct tape and ribbon to make bracelets using this same tutorial. They are great for bracelets, but don't have enough stretch for headbands.

Tuesday, June 7, 2011

14 Days until...

We are in the most magical place on earth- DISNEY WORLD! I am so excited I can hardly stand it. My mom and I wanted to wait until Jadyn was able to really enjoy it and tall enough to ride things! Well, she is 6 years old and 46 inches tall which, in my book, qualifies as being the perfect time to go. Instead of throwing up Disney World updates on Facebook, I am going to try and blog about it at the end of every day. Of course, I will still post pictures on Facebook during the day! Here are some pictures of the shirts I made for our first day- yes, we are going to be one of THOSE families that wear a themed shirt during vacation! Obviously, the first one is for Jadyn, middle is for my mom and the last one is mine!

Rolled Fabric Flowers

Simple Circle Fabric Flowers

Cut out different size circles. I use a lighter to burn around the edges for a more worn look. Using hot glue, glue the circles together. While each layer is drying, crinkle the center to add texture. Add some embellishments and you are done!

If you use satin fabric, burn the edges with a lighter. It will darken the fabric around the edges while causing the edges to curl up. It looks amazing! If I can't get the flower to crinkle the way I want, I spray some water and hairspray and set it with the blow dryer! *There is no need in buying the fancy tools when you can use what you have at home!*

Monday, June 6, 2011

Bulletin Board Bling!

Jadyn is at an age where she wants pictures of her friends in her room so she asked for a bulletin board. I was not about to hang some ugly, tan thing in her cute room OR spend $15 for a new bulletin board. Luckily, there was a garage sale down the street and they had a few bulletin boards- aren't there always bulletin boards at garage sales?! It was ugly and a little beat up, but only $1. We painted the wood frame and added a few embellishments. Using spray adhesive and some fabric, we covered the cork. It is best to use fabric with simple patterns so the pictures don't get lost in the design. Using a knife, I cut the excess fabric from around the edges. To make the fabric lines look cleaner, I took a butter knife and tucked them under the wood frame. TA-DA! Now, it's time to hang pictures on it and we only have plain silver push pins. Use a little E-6000 and buttons, rhinestones or whatever you can find and glue them on the push pins! Jadyn was pretty proud of her creation! She did all of the push pins by herself!

30 Day Challenge: Days 5-7

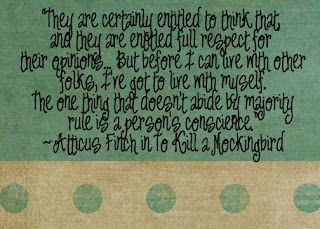
Day 5: Favorite Quote


Day 6: Whatever tickles your fancy
*Since I am still on a 'quote kick', here is another one of my favorites! When it is my time to leave this world, I want there to be proof I lived and loved.


"I don't want to drive up to the pearly gates in a shiny sports car, wearing beautifully tailored clothes, my hair expertly coiffed, and with long, perfectly manicured fingernails. I want to drive up in a station wagon that has mud on the wheels from taking kids to scout camp. I want to be there with a smudge of peanut butter on my shirt from making sandwiches for a sick neighbors children. I want to be there with a little dirt under my fingernails from helping to weed someone's garden. I want to be there with children's sticky kisses on my cheeks and the tears of a friend on my shoulder. I want the Lord to know I was really here and that I really lived."


-Marjorie Pay Hinkley


Day 7: A photo that makes you happy


This is a picture of Jadyn and her sweet friend, Ruby at kindergarten graduation. They were in the same pre-k class and spent lots of time together after school playing. (I work with Ruby's mom!) In the spring of last year, Ruby was diagnosed with leukemia. Jadyn wasn't really sure what this meant. I tried to explain what was going on while trying to make sure she felt informed and not scared. She was concerned and upset that Ruby's "blood was sick" and she wouldn't be able to go to school. Ruby's mom, Shelly, is amazing and made sure Ruby's life stayed as normal as possible. She would take Jadyn home after school to play and the girls would record videos for each other. When Ruby started to lose her hair, Jadyn came home and said, "Isn't Ruby's head so cute and fuzzy? She looks beautiful!" Ruby was finally able to come back to school for a short time and play with the other kids. Jadyn was SO excited! Right now, Ruby is rockin' a cute, little pixie cut! Of course there are some kids that don't know what Ruby went through or why her hair is short (or there parents have not taught them any manners!) so they made a comment in front of Jadyn (BAD IDEA!) about Ruby looking like a boy. I wish I would have recorded Jadyn when she was telling me about this- she was LIVID. I asked her what she said to the kid and she said, "Well, I told him- You know, Ruby had leukemia and her blood got sick. She had to take medicine that made her hair fall out so she could get better." I am pretty sure this was all said with her hand on her hip, one finger pointing in their face and head moving around with lots of attitude. When I look at this picture, I am reminded of how truly blessed I am. I am also reminded of what friendship really is and about the innocence of children. I mean, look at their eyes and smiles... they genuinely care about each other. There are no ulterior motives to their friendship- they just like being together and having fun!


Sunday, June 5, 2011

Exfoliating could rid your body of cellulite- WHAT?!

While attempting to tan, I received a horrible sunburn. (I know, I know- wear sunscreen.) The sunburn progression started with pain, started to itch and is now peeling. I needed an exfoliant to help speed up the awful peeling phase, but couldn't find one and wasn't in the mood to leave the house. I've always heard of people making their own bath products but never actually tried to make them myself. I figured I probably had all of the things needed to make my own scrub, but had to find a recipe. While searching for the PERFECT sugar scrub recipe, I came across an article about coffee scrubs. Apparently they are used in a lot of spas and are "absolutely wonderful" for your skin. Most people take their coffee in a cup with a little sugar and cream, or whatever your preference, to give them a little caffeine boost. The caffeine is also what makes the coffee body scrub so wonderful! The caffeine helps RID YOUR BODY OF UNWANTED CELLULITE (ladies, you paying attention now?!) by redistributing the fat cells and decreasing the appearance of cellulite. It also helps shrink blood vessels which reduces the appearance of varicose veins. This whole coffee scrub sounded pretty interesting so I decided to test it out... and it is ABSOLUTELY WONDERFUL! I do NOT recommend using this in the bath. I made this mistake and it looked like someone poured their spit cup in my bath water. Gross! After I got past the fact that I appeared to be bathing in a spit cup, I started to notice how great this scrub was! It doesn't burn your skin or leave you feeling oily. After using, my skin is silky smooth and I think the smell of the coffee gave me some energy! Below is the recipe I used (it was a combination of what I could find in the pantry) but I am sure you can find a lot more online!


Jadyn made her own sugar scrub and wanted me to post her recipe! So here it is!

Monday, April 4, 2011

30 Day Challenge: Day 4

Favorite Book:

I couldn't pick one so I chose a whole series. What is better than Janet Evanovich's Stephanie Plum Series?! If you answered NOTHING, you are correct! This series may not be the best literature, but it is definitely entertaining! I want to BE Stephanie... seriously. :)

Sunday, April 3, 2011

What's up, TECHNOLOGY!

In case you haven't heard- technology is kind of a BIG DEAL! When used effectively it can work wonders in the classroom! I was doing a little app shopping yesterday and came across these two apps worth sharing.

Zapd- This app allows you to build websites from your phone, iPod or iPad in a short amount of time. You select the template then choose what you want to add to it- text, photo or link. It is so easy! Once you finish, you can publish and send it to your facebook, twitter or email. Best part- it's FREE! Here is a sample webpage I did for my child development class.


MindMeister- This app allows you to create Mind Maps from you Apple device. LOVE it! I LOVE mind maps- eventhough, a map could not even begin to help me understand my mind! They are a great way to organize thoughts and ellaborate on concepts. Below you will find two example of mind maps. The first one is kind of what one would look like if a student drew it- yes, I know it was done on the computer... work with me here. The second one was done using the app in about 5 minutes! You can add pictures and different colors to it, but I was just trying to create an example. Again, this is also a FREE app!


30 Day Challenge- Day 3

Favorite Television Program Well, this is an EAAAAASY one- NCIS! I absolutely love every single character! Abby is full of quirkiness and sass, Gibbs is the leader but has compassion, McGee is so cute and nerdy, DiNozzo is HOT (I wouldn't object to being Mrs. DiNozzo!), Ziva kicks butt (LITERALLY!) and Ducky is full of wisdom!


Feel free to sit and stare at their hotness for a few minutes... Other than NCIS, I love crime shows-Criminal Minds, NCIS LA, Without a Trace, Law & Order: SVU, Snapped... Do I need to continue?! I hate reality tv more than anything. I teach high school students and as most of you know from experience, they are FULL of drama! Why would I want to come home and surround myself with more drama?! No, thank you. I am not entertained by people making fools of themselves.

Saturday, April 2, 2011

Maybe YOU are the Problem

I was on my way to go eat today when a car passed me. A woman was driving and a man was in the front seat with his feet on the dashboard, all relaxed. Based on the massive amount of STUFF hanging from the rearview mirror, I'm assuming this was her car. (I don't know any guys that have a bunch of crap hanging in their car!) As she drove past me, I noticed a massive decal across the back of her car that said JERK MAGNET. My first thought is- who the heck advertises that everyone they have dated or been 'involved' with is a jerk?! Which led to several other unrelated thoughts inbetween (thank you, ADD!) that eventually led to this:

If every guy you have EVER dated is a jerk, have you ever considered that maybe the problem isn't them... it's Y-O-U?!


What are YOU doing that is attracting these jerks? Why do YOU continue to go back to the same type of guy? I'm just sayin... If it is the same stinkin' problem everytime, you need to reevaluate and make some changes to make sure you don't continue to invite jerks into your life. And for goodness sake, DON'T ADVERTISE IT ON YOUR CAR! Maybe THAT is why they are all flocking to you!


Side note: I watched Ramona & Beezus with Jadyn today and LOVE, LOVE, LOVED it! I cried, hugged Jadyn a little tighter and had a newfound appreciation for all her little quirks! It can be tough raising an 'outside of the box' child, but it definitely makes life a lot more COLORFUL!

30 Day Challenge: Day 2


Favorite Movie: Without a doubt, A Knight's Tale is my favorite for a few reasons. One- Heath Ledger in all his grungy-sexiness. He was my first celebrity crush because of this movie! Two- I LOVE all the costumes! Three- Part of the movie when they are at the dance in the matching green clothing!


You can watch a clip of the dance scene here!


Friday, April 1, 2011

30 Day Challenge: Day 1

Favorite Song: Ohhhh, man... There are so many songs that I LOVE, but I the one song I will never get tired of is After an Afternoon by Jason Mraz! My music choices depend on my mood and what I've got going on in my life at the moment. Don't get me wrong- I enjoy bobbin' my head to a good beat every once in a while, but I like music I can relate to. In the song he talks about how he feels after an afternoon with women he cares about, but there is one part that stood out.

"Aspects of life, they confuse me. You and your thesis amuse me."


I am a people-watcher. I observe and evaluate ALL the time- whether it is someone eating at a table alone or a couple deep in conversation. I wonder why the person is sitting alone or what they couple is discussing... I am amused by people, ALL people. I may not understand all people, but I think they are interesting and want to find what makes them, well... THEM! These are the aspects of life that confuse and amuse me!


If you have never listened to Jason Mraz's albums, I highly recommend them- yes, ALL of them!